“Another new bike hub ‘standard’? Really?!?”
Yeah, we know.
First it was BOOST, then it was SUPER BOOST, now it’s SUPER BOOST PLUS. It’s nearly impossible to keep up at this rate. But just because there’s a new trend in the cycling industry doesn’t mean you should have to throw out all of your old stuff. In fact, we think the “old” parts that still work well deserve a place at the table too. In this case, we’re talking about hubs and the ever-changing “standards” in front and rear axle spacing. So what’s going on here? Do the new standards really matter? And how do I BOOST my old wheels? We’ve got the lowdown for ya.
Once upon a time, the “standard” thru axle spacing for mountain bike frames was 100mm in the front and 142mm in the back. But as the demand grew for mtn bikes with bigger wheels and fatter tires, the industry released frames with BOOST spacing — 110mm in front and 148mm behind (check out the images below). This added more design flexibility to accommodate bigger tires and shorter chainstays. The extra space also allows for wider hub shells with better bracing angles for the spokes, which in turn yields a stronger and stiffer wheel. This is especially beneficial with 29-inch diameter wheels, but all sizes can feel the love.
Front hub spacing: Standard (left) and BOOST (right)

Rear hub spacing: Standard (142mm), Boost (148mm) and Super Boost (157mm)

They say that if something is worth doing, then it’s worth doing twice. So it should come as no surprise that just as the cycling world was getting used to BOOST spacing, someone went ahead and made an even wider frame and called it SUPER BOOST. This design goes even further by expanding the rear space to a whopping 157mm. This provides the same benefits as BOOST spacing, but with even more room for plus-sized tires and additional cassette cogs. If you’ve heard about SUPER BOOST PLUS, don’t panic. This is just an uninspired name for a slightly different hub. It still uses the same 157mm width as before, and sometimes frame manufacturers will use these interchangeably.
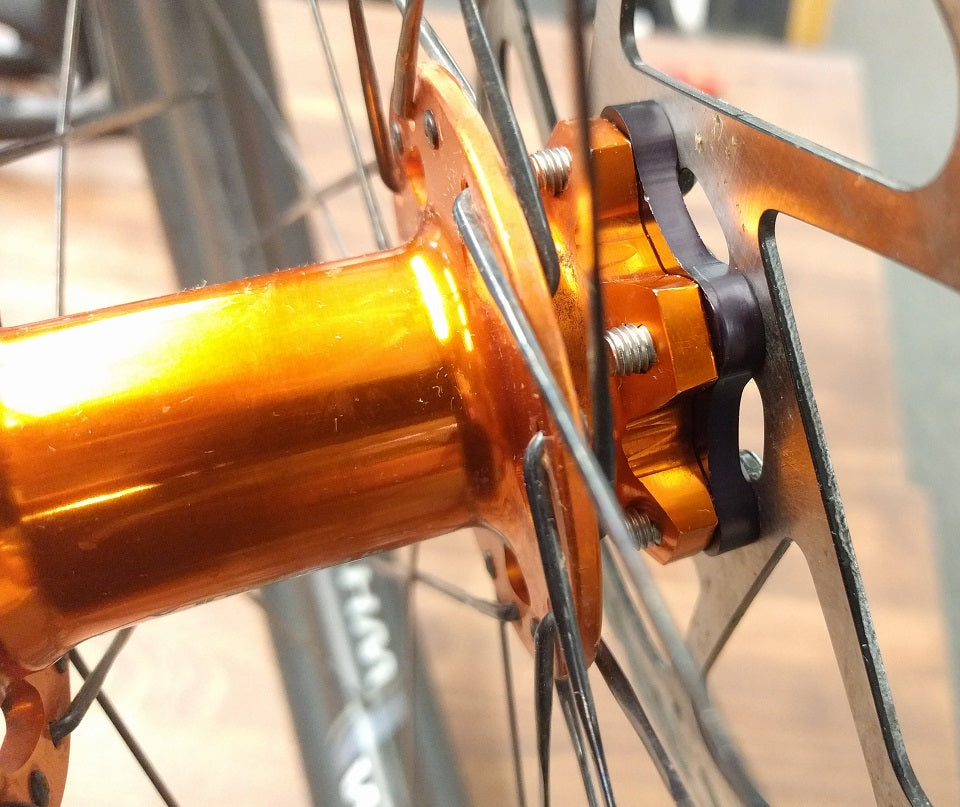
The Super Booster Kit installed and ready for some super boosted action.

The Super Booster Kit installed and ready for some super boosted action.

The Super Booster Kit installed and ready for some super boosted action.

If you get a new frame with either of these spacings, but don’t want to drop a pretty penny on new hubs, you can use Problem Solvers Booster (Front and Rear) and Super Booster (rear only) wheel adapter kits to fill in the gap from one standard to the next and re-position the disc brake rotors to line up with the brake caliper. The Booster Kit converts “standard” (100mm and 142mm) hubs to BOOST spacing (110mm and 148mm), while the Super Booster Kit upgrades BOOST rear hubs (148mm X 12mm) for use in SUPER BOOST frames (157mm X 12mm). DO NOT try to use both kits at the same time to make the jump from 142mm all the way up to 157mm.
Using the Front Booster is pretty straightforward, because the additional spacing is equally shared between both sides. Just add the spacers for the brake disk and each side of the hub and you’re done!

However, there are some adjustments to be made in the case of the Rear Booster and Super Booster Kits because all of the additional room is taken up on the non-drive side, shifting the whole wheel to the right (if you are looking at it from behind). This is done to maintain drivetrain functionality, keeping your cassette in place while adjusting your brake disk to fit.

After you install the rear kits, you’ll need to re-dish the rear wheel. That means moving the wheel back to center (3mm for Boost and 4.5mm for Super Boost) and compensating for the shift caused by the spacer. This is done by carefully tightening the spokes that pull toward the non-drive side (the side of the hub without gears) and loosening the spokes that pull to the drive-side. If you’re unfamiliar with truing a wheel, re-dishing may be a bit outside of your wheel-house. (See what we did there?) There are a lot of factors at play, such as vertical/horizontal alignment and spoke tension, and missing the mark in any of these areas could adversely affect the performance of the bike, or even cause wheel failure. Bring the wheel to your local shop if you don’t have the experience.

Unless you’re also using a new crank with chainring placement optimized for BOOST, your chainline should not be affected by the addition of the Problem Solvers Rear Booster or Super Booster Kits, and you can keep using your original “standard” drive components. If you experience poor shifting or chain rub on the tire, then the chainline will also need to be addressed. Again, this is something your local shop can help you with if you’re unfamiliar.
Hopefully that helps clear up some of the fog surrounding BOOST, SUPER BOOST, and our wheel adapter kits. If you have any questions, please let us know! And come back again soon for more!