Problem Solvers is the sole provider of the venerable Bushnell™ Eccentric Bottom Bracket. This is the classic, industry-leading design that has enabled proper chain tension on tandems and oddball singlespeed rigs since the ‘90s. But while we briefly covered how it works, we wanted to show just how convenient and slick these things really are. So, if you want to learn how to install and adjust a Bushnell Eccentric Bottom Bracket, stick around. You’re in good company.
Tools You’ll Need
- An awl or small poking device
- All-purpose bike grease
- 4mm hex wrench
- Torque wrench with a 4mm hex bit
- Pin spanner wrench or a bottom bracket cup wrench
How to Install and Adjust a Problem Solvers Bushnell Eccentric Bottom Bracket
Step 1: Prep the EBB and frame
First, remove the outer retaining rings using an awl or similar tool (fig. 1) to disassemble the EBB. Then clean and liberally grease all of the contact surfaces. This includes the outside of the wedge nuts, the wedge bolt threads, the inside of the wings and the inside of the frame’s bottom bracket shell (figs. 2–4). Carefully inspect the frame and bottom bracket area for cracking, fatigue or other signs of damage. If any frame part shows signs of damage or fatigue, consult your dealer or replace the frame before riding the bicycle. Once you’re sure that everything is in good shape, you can start reassembling the EBB.


While reassembling your Bushnell Eccentric Bottom Bracket, make sure that all access points are in the correct places for your application. For tightening and adjustment access, the 4mm wedge bolt head should always be on the opposite side of the bike from the chainrings. So, on a solo frame, this access point should be on the non-drive side (left, if you’re sitting on the bike), while on the front seat of a tandem, this point should be on the drive side (or right, while on the bike). However, the main shell of the EBB will always be the same, with the reverse, counter-clockwise spinning threads facing the right, drive side of the frame. This means that when you install your bottom bracket cups, both sides will tighten by rotating towards the back of your bike.Getting all of this correct during reassembly will save you a lot of trouble later on.


2. Install the EBB into the frame
Insert the EBB into the frame’s bottom bracket shell and slide it into a central position. Side-to-side adjustment of the EBB to optimize your chainline is ok, but ONLY if the EBB does not extend outside the frame’s bottom bracket shell. Rotate to the EBB so that the wedge bolt is at 3 o’clock when viewed from the drive side and 9 o’clock from the non-drive side (fig. 5). Then use a 4mm hex wrench to tighten the bolt and cinch the EBB into place (fig. 6). For now, just get it tight enough to hold it in place while you finish working.
3. Install the bottom bracket cups and assemble the drivetrain
Grease the EBB threads as well as the bottom bracket cups (fig. 7). Install the bottom bracket cups per the manufacturer’s instructions (fig. 8). Then assemble the cranks, chain, and rear cassette/cogs like you would on any other bike (fig. 9).


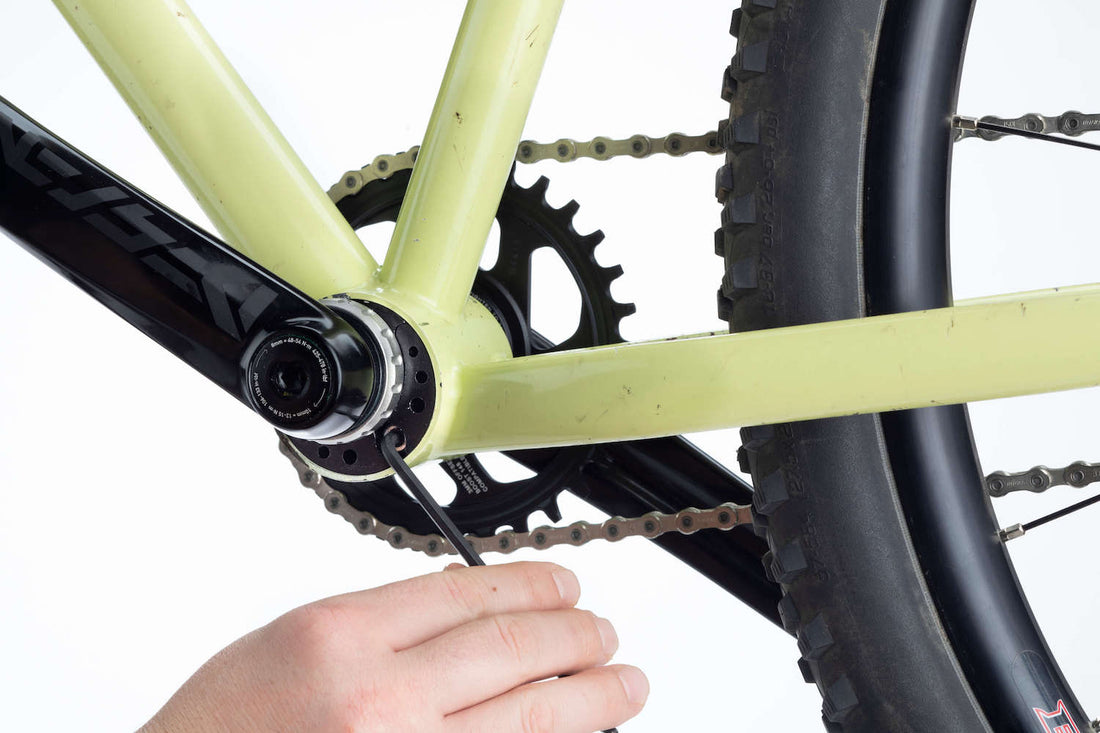
4. Adjust your chain tension
To adjust your chain tension using the Bushnell Eccentric Bottom Bracket, first loosen the wedge bolt with a 4mm hex wrench. The bolt must be loosened until both wedges are free. Otherwise the EBB will not rotate. If one side gets stuck, you can loosen the bolt more, and then lightly tap it free, and consider adding more grease next time. With the chain installed, rotate the EBB forward using a spanner wrench or bottom bracket tool (fig. 10) until the chain is tight, and then back it off slightly. Then, tighten the 4mm wedge bolt to 8.5–10Nm (fig. 11) with a torque wrench. If your chain is too loose or too tight, readjust the EBB fore and aft as necessary to get it right.


Now you should be ready to roll. Be sure to check the EBB wedge bolt and chain tension before every ride, adjusting and tightening as necessary. If you are at all unsure about your EBB installation, or have questions, visit your local bike shop for help. Check back here soon to learn about more great cycling gadgets and gizmos.