COMPATIBILITY:
The Travel Agent is compatible only with linear-pull brakes that use a brake noodle. It is not compatible with disc brakes, road caliper brakes, cantilever brakes or center-pull brakes.
REQUIRED PARTS & TOOLS
- New brake cables and housing
- Cable housing cutter
- Cable cutter
- 4 & 5mm hex wrenches
ASSEMBLY INSTRUCTIONS
To Increase Cable Travel (Short-Pull Levers and Long-Pull Brakes):
- Install brake lever(s) and brake(s) per manufacturers’ instructions—because we don’t know what you’re using.
- Place the Travel Agent in your linear-pull brake’s noodle carrier, cut a new piece of housing to the appropriate length, and string brake cable through the lever and housing.
- Remove the Travel Agent from the brake’s noodle carrier.
- Install the adjusting barrel in the inside position (fig. 1) and string a NEW brake cable through the lever and housing, making sure the housing is firmly seated at both ends. Do not re-use an old or worn brake cable.
- Pull any cable slack taut (fig. 2).

Figure 1: Adjusting barrel in the inside position

Figure 2: Pull that cable tight, yo.
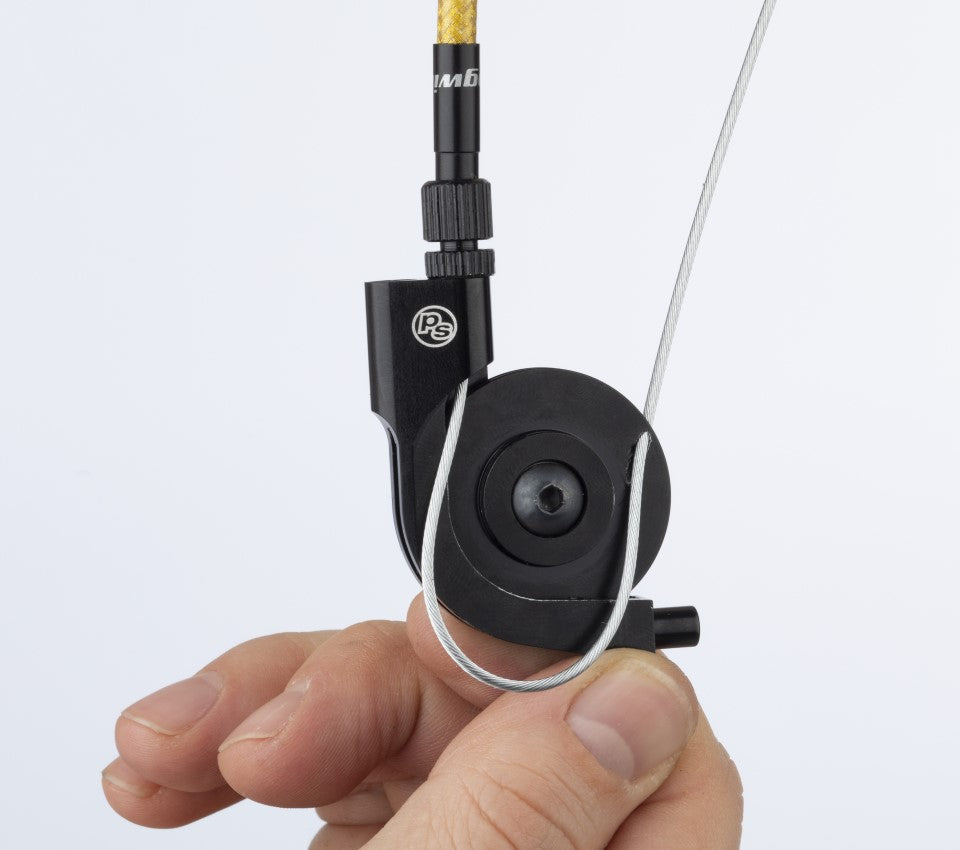
5. Position the bridging hole at 2 o’clock (vertically) and feed the cable through, making sure to wrap the cable around the inner cable pulley and pull tight (figs. 3–5).

Figure 3: Around the small pulley and out the bridging hole

Figure 4. Not the leg-lock.
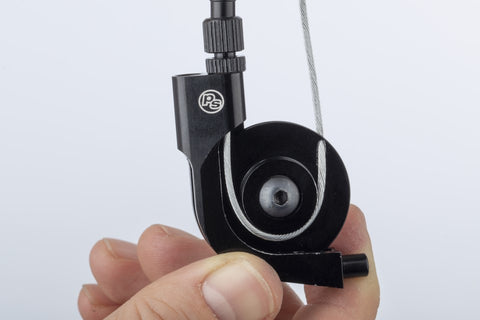
Figure 5: Read for the next step...
6. Making sure that the bridging hole is still aimed at the 2 o’clock position, feed the cable counter-clockwise around the outer cable pulley and through the cable exit hole (figs. 6, 7).

Figure 6: Keep that bridge hole at 2 O'clock

Figure 7: Almost there
7. Insert the Travel Agent back into the brake’s noodle carrier, then pull the cable as taut as possible and attach it to the brake arm (fig. 8). Torque the brake arm anchor bolt per manufacturer’s specifications.
WARNING: The cable must be routed through the bridging hole at or near the 2 o’clock position as shown in Figure 8. Failure to do so can result in braking failure.

8. Squeeze the brake lever firmly several times to seat the cable properly in the Travel Agent, then adjust the brake per the brake manufacturer’s instructions for proper brake pad clearance. NOTE: Increased brake arm spring tension may be required to make the brakes return properly.
Installation for roller use is about the same, just without all that routing around the small pulley